In order to make the transition easier from other CRMs, ResponseCRM has updated the way we work with product groups and charges.
Product Groups no longer have an API GUID Key on Accounts created after 7/7/2019, and these API GUID Key's are no longer needed to process products through the API. (Please see Note at the bottom of the page for existing Accounts who enrolled prior to 7/17/2019 and still work with product API GUID Keys).
1. To get started, go to to CRM > Products
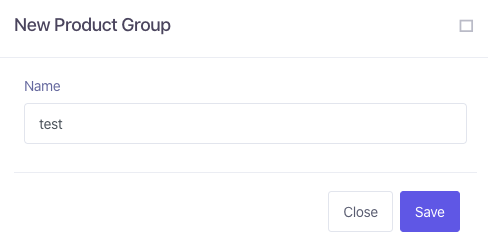
2. Click on + NEW to create a new product group, enter the product group name, and click Save.

3. The next step is to create the product charges.
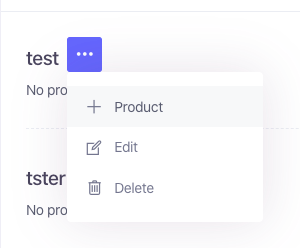
Click on "... " button and select + Product
4. Enter Product Name
5. Enter Product Amount
6. Enter Ship Amount if additional ship charges will be added. NOTE: Entering a Ship Amount will charge this additional amount on top of the product Amount. Ship Amount is also used to provide shipping amounts within email autoresponders.
7. Select Type to choose type of charge.
Charges are the actual charge items that will be processed when a transaction occurs.
There are 3 types of charges:
Signup Charge- A one-time charge
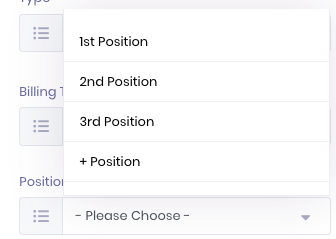
Upsell Charge - A one-time post-transactional sale. When creating an Upsell charge, there is an additional "Position" option available to tag an upsell to a certain position for reporting purposes. Example, if you have 3 upsell products, tag the first Upsell to position 1, Upsell 2 to position 2, etc.
Shipment Charge - a one-time shipping charge
8. Fulfillment Options
If the product is not shippable, under the "Is Shippable" tag, leave it defaulted to No (not green). Otherwise, click it to green for Yes.
If you have already configured your fulfillment account under CRM menu Administration > Plugins and have it active, it will be available here for you to select within the fulfillment provider dropdown.
Enter the product SKU that will be sent to your fulfillment provider within the External Product Key field.
You can also set a fulfillment delay between the time of ordering and having it sent to your fulfillment provider. Entering a 5 will send the order to fulfillment 5 hours after it has processed within the CRM.
9. Tax Options
If this product will be taxed, please refer to the Sales Tax section within the Knowledge-Base to complete sales tax setup.
Enabling Recurring Cycles for Subscription Billing:
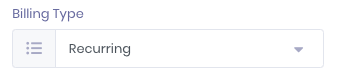
The charge types can also be adjusted to have recurring cycles added by changing the billing Type from One-time to Recurring under Product Information once product has been created:
To Setup Recurring cycles:
Note: Recurring cycles are separate charges than the initial charge. For example, if you create a Signup charge and add recurring cycles, the signup charge will be the initial charge, and your "Recurring Cycle 1" will be your first recurring charge after the Signup charge.
a. On the product you want to add recurring cycles to, click on Edit under Actions (to the right of the product). Click on Recurring Cycles Details. Enter the Price. Enter Bill Delay, which is the number of days after the trial or initial charge (Example below). If your first rebill cycle requires a shipment, then check the Shippable option. You can also enter a new SKU for the recurring cycle if different from your initial signup charge, and an alternative product name if desired. If SKU and Product Name are left blank, the SKU and Product Name of the initial charge will be used.
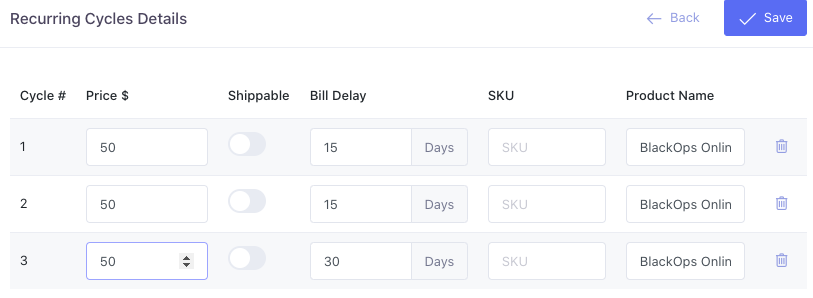
Add additional recurring cycles to extend your subscription billing. In the example above, the first recurring cycle is set to bill your customer $50, 15 days after the initial charge. The 2nd recurring cycle is also set to occur 15 days after Cycle 1, and to bill the customer another $50. The settings put for the 3rd cycle will also apply to further ongoing cycles. In the example above, the 3rd cycle is set to occur 30 after Cycle 2 (Bill Delay), and bill the customer $50. Every cycle after the 3rd will occur every 30 days after the previous cycle, as set in the Bill Delay
b. The last step is to make sure the following field is defaulted to Indefinite for ongoing subscriptions.
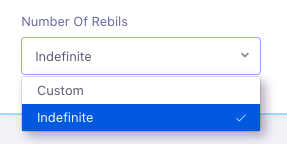
If you would like to the subscription charges to end on a specific cycle, then enter the final cycle to bill on. For example, if you were to input 5, then the subscription cycles would end after the 5th cycle.
Adding Recurring Retries:
After an unsuccessful recurring charge attempt, the recurring charge deactivates itself automatically, and will have to be manually reactivated. The next option are retries, which are recurrent attempts to charge after an unsuccessful recurring charge attempt. Up to 9 attempts can be made, each at different amounts and times if desired. To enable retries, click on Retries to the left and enter the criteria for the retries. Under "Transaction Response Text Filter" check Select All or choose the options that you want from the drop down, then click save.
------------------------------------------------------------------------------------------------------
Note: Existing Accounts who have enrolled to ResponseCRM prior to 7/17/2019, will still be able to use these product guid api keys without issue. Client Accounts who have signed up before 7/17/2019 will also still see these keys within their product groups, and will be referred to as the Legacy Key:

Note: A product group can be solely created for upsells charges. This will be useful for upsells that have a subscription option available.
Note: Once a product group is created, you can then create charges. An unlimited number of charges can be tagged to one product group.
------------------------------------------------------------------------------------------------------