Creating trigger events is the 2nd step in creating your email notifications. Here is where you are going to attach your SMTP profile to your template and the event type, and apply the event to your product(s).
To add an event, click on “+ New” within the Events page.
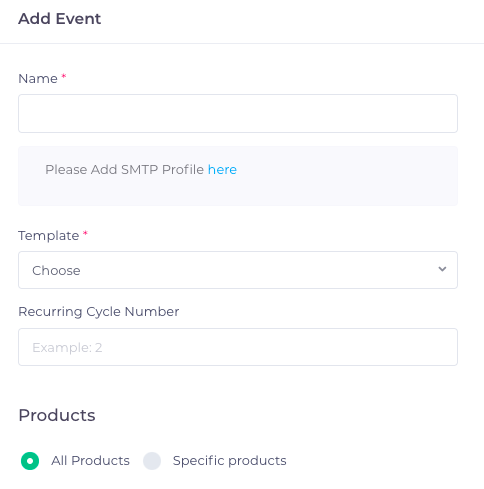
Select the SMTP Profile to use with this event
Enter your Event Name
Choose the template
*Enter a Recurring Cycle (Optional and only for use with Recurring Confirmation emails. You can create a unique email for each recurring cycle.)
Select the product(s) that you want assigned to the event and Save.
After you have created your email events, the final step is to apply them to your site within your site's settings page.
Navigate to your site's settings page (CRM menu: CRM > Sites).
Within the Email Autoresponder tab of your site's settings page, click on New.
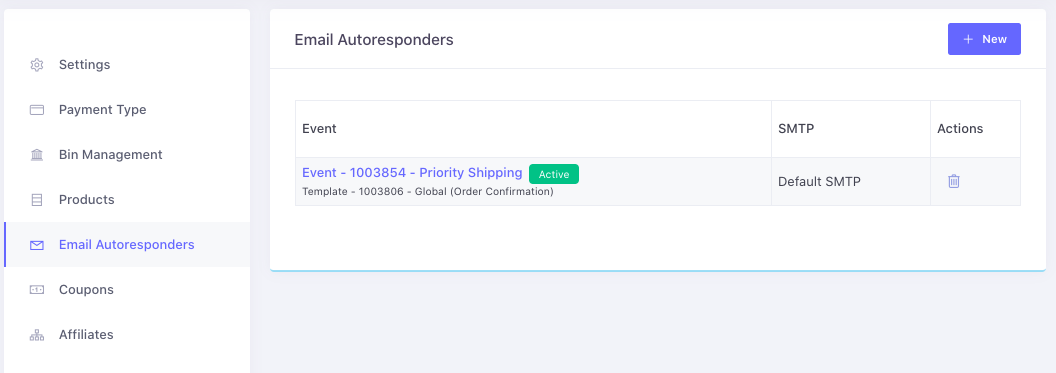
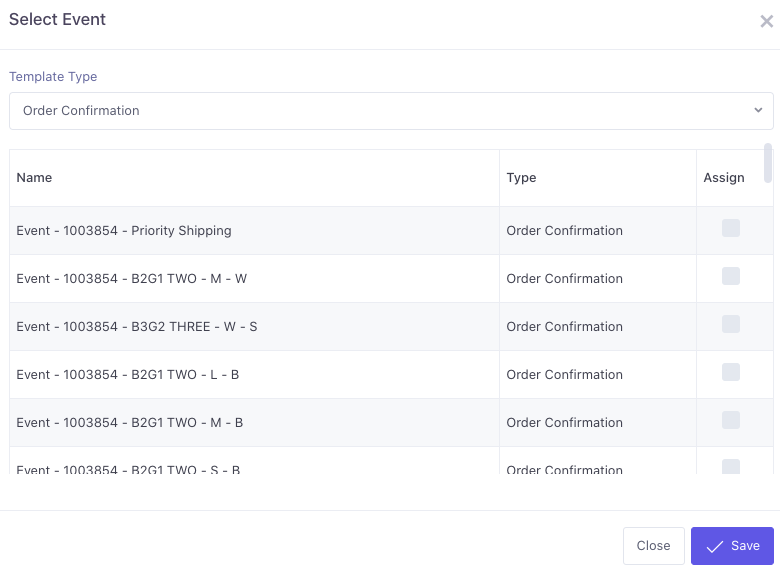
Then select the events you want to assign to your site and Save.
Note:
-
Do not deactivate or delete any template that has already been assigned to an event, or else the event will no longer function.
-
Only one globally assigned event of the same type will work when assigned to the same products. When assigning more than one event of the same type globally, the oldest created event will take priority.